Thursday, December 24, 2015

2015: Greenhouse Plans

After the failure of the brussel sprouts from cold, dealing with garden pests, over watering due to rain, and limited production from the garden, I started 2015 with the goal of building a greenhouse to house all of my family's plants.

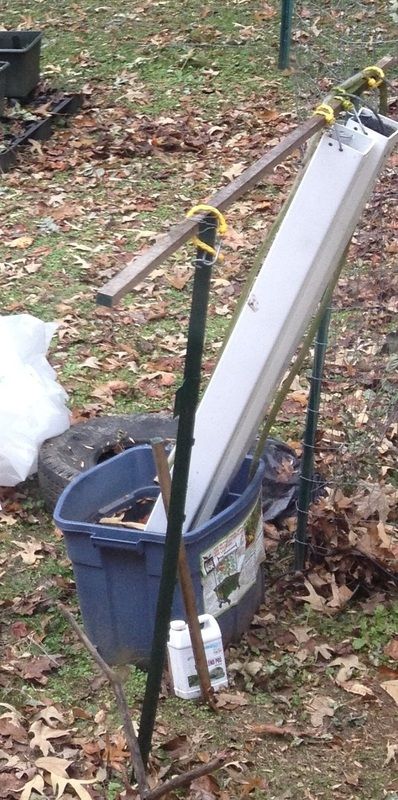
I started by first laying plastic down where I wanted the greenhouse to be. Plastic helps kill the grass and reduce the location for bugs to dwell. I used black plastic which heated up well from the sun (further making the place inhospitable), plus it was also cheap. It also directed rainwater away from the garden. It had the added benefit of providing a surface to walk on that did not create mud. I found that the plastic was not slippery either because it had a tendency to deform to match footprints (sort of like stepping on foam flooring).

Then I started to plan my greenhouse.

Criteria:

  1. cheap enough for my budget
  2. easily removable if I need to move (no foundation or solid building)
  3. fit whatever housing codes
This narrowed my selection down to the following kinds (that I was able to research):
  1. PVC hoophouse
  2. disposable grow house
  3. plastic tent
  4. Some combination

Pros and Cons PVC Hoophouse

PVC Hoophouses are greenhouses made with plastic and PVC piping that is bent to form an arc similar to how old military tin quansot-huts were built (think Gomer Pyle shown in this lunchbox from greatestcollectibles.com)


  1. Pro: PVC hoophouses are cheaper than building with wood and clear plastic siding. Plastic sheeting ($42), tape ($10), 3/4" PVC piping (18x3=$56), PVC couplers (14x.28=$4), wood baseboards/support (8x8=$64), staples ($4), and screws ($4) can make a hoophouse that covers a 20x30 ft area for roughly $180. See the below diagram or how to build something similar at http://www.aces.edu/pubs/docs/A/ANR-1105/ANR-1105.pdf 
  2. Con: Since I am using vertical farming methods, hoophouses have areas of dead space that reduces the amount of growing area based on the height of the vertical growth. This is intensified if the ground is sloping like in my backyard (See below diagram).  

  3. Con: PVC warps in the sun or cannot support vertical weight on the top so the structure needs supports in the center to prevent collapse (See Example of a hoophouse in Connecticut. Source unknown).  Although not too big a deal based on the area that the support uses, it decreases the amount of growing area and affects the planting layout. It also adds to the price of construction. Or PVC cross bracing is added which also adds more costs.
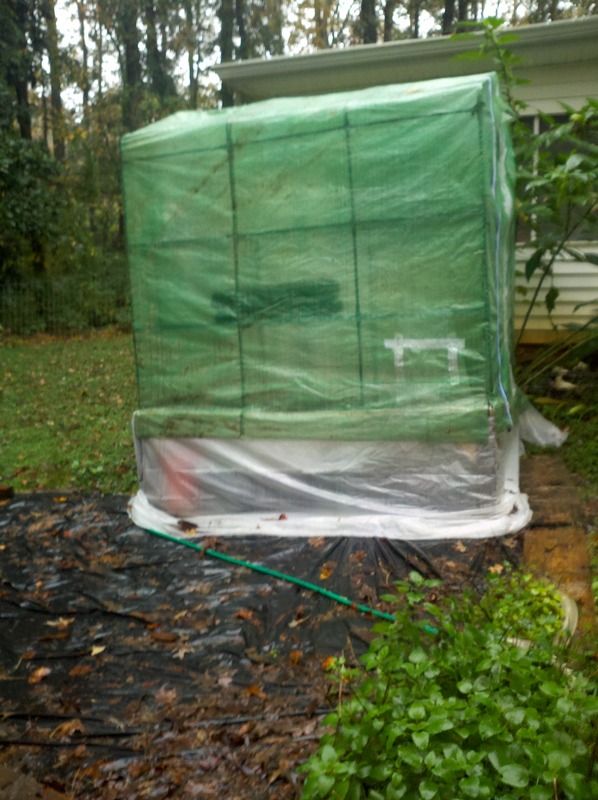
Pros and Cons Disposable Grow House
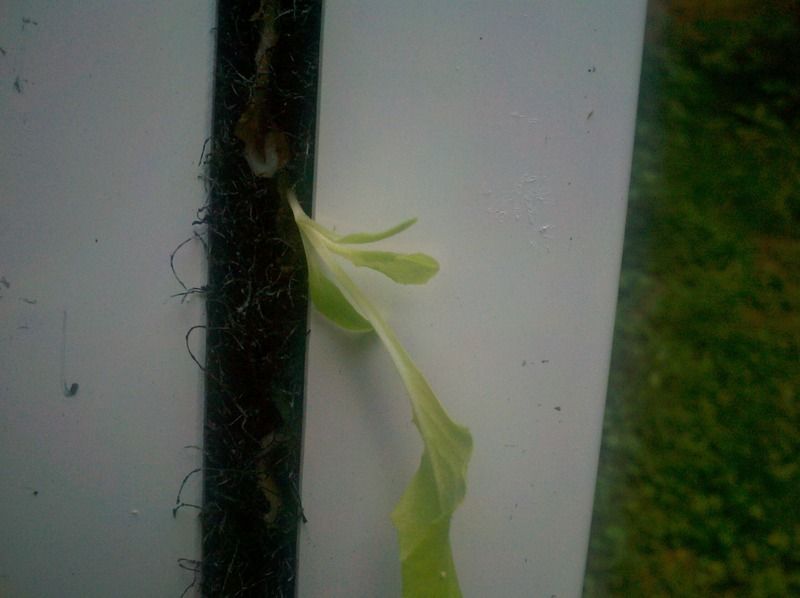
  1. Pro: Ready-made and easy to erect. If you notice in the images from previous posts, we already have one for seed starting. It is the same one shown from the below image from Pinterest.  
  2. Con: To cover a 20x30 ft area, I would have to buy multiple ones which are cost prohibitive or find one at the same size area which would again be cost prohibitive.
  3. Con: Multiple ones would have access and ventilation difficulties that I may not be able to solve without increasing costs.
Pros and Cons Plastic Tent
In this design, clothesline or heavy rope is used to strengthen the poles upright while the plastic is laid on top. Plastic can be stapled to the poles and staked to the ground. Clothesline is staked to the ground.
  1. Pro: Plastic tent is the cheapest for the same given area. Plastic Sheeting ($40), clothesline made of plastic coated galvanized wire ($36), staples ($4), loop stakes ($10), 4x4x120 lumber ($24), and 2x4x96 lumber ($24) can make a plastic tent that covers a 20x30 ft area for roughly $138.  
  2. Con: Areas of the roof may pool water which may be why it is not popular.
  3. Con: Greater chance of plastic tearing.
Pros and Cons Combination (My Design)
In this design, I combined elements of the PVC hoophouse with the plastic tent. I wanted to add rigidity, and keep costs comparable. It almost serves as a lean-to with the poles as the main support and PVC serving as the frame strengthened by the clothesline. PVC T-couplings are used where the PVC frame meets the clothesline. PVC T-couplings are used where PVC frames intersect (it is not illustrated that way in the drawing). Below is a computer rendition of the hand drawing I had planned to submit for my building permit. It just needed dimensions added to be ready for review. Overall, I really wanted to build this style of greenhouse.


  1. Pro: Construction cost is comparable.
  2. Pro: Makes better use of land space as compared to a Hoophouse.
  3. Pro: Less likely to have areas of roof where water may pool as compared to a plastic tent.
  4. Pro: Compliments an earlier method of staggering plant heights.  
  5. Con: Untested design.
Next: 2015: Greenhouse Building Permit

Growing Vegetables Vertically with ZipGrow Towers

Zip Grow Towers


I started with Zipgrow Towers almost a full year (2014) after my aquaponics experiment failed.  I liked the appeal of vertical farming in urban/suburban areas and thought Zipgrow towers was a versatile and easy approach that looks scalable.

The concept behind Zipgrow Towers is fairly simple. 
  1. Sandwich plant seedlings (grown from seeds or bought at the store) between a water absorbent cloth and a fibrous media. 
  2. Slide the entire assembly into the Zipgrow Tower.
  3. Use a pump (from a water fountain or sump pump) and simple drip irrigation plumbing (used in lawn care) to send nutrient rich water to the top of the tower.
  4. Drip the water down into the tower.
  5. Collect the water from the tower into the sump.
REALLY SIMPLE AND FAST. I did not have to fiddle with a bell siphon and the amount of hardware needed was severely reduced. Woohoo!

The following pictures are my interpretation of using a ZipGrow tower. Better representations of how it should be displayed can be found on the manufacturer's website brightagrotech.com. Most of their displays have gutters and the towers hanging which look much more refined than my first setup (pictured below).


My Infrastructure Expenses:
Per Zipgrow Tower $65
Water pump $45 (http://www.homedepot.com/p/Beckett-400-GPH-Submersible-Pond-Pump-FR400HD/202563430) I will explain sizing a pump a little later.
Hose (re-used from aquaponics normal price $10)
Hose plug $free (piece of cut wood)
Irrigation plumbing $10 (drip lines, etc.)
20 gallon container (re-used normal price $12)
scrap wood
spare fence stake

Plant Production Expenses:
Plant Nutrients from local hydroponic store $20
Plant Seedlings

2014 Spring and Summer: I started with cantalope and cucumbers. The plants started growing almost the next week. It appeared that they did not experience any root shock from being transplanted into the towers. 
Overall, the cantalopes grew but never produced flowers or fruit. Eventually, the cantalope developed downy mildew which was probably because I was adding too much water or that their roots were not made for a tower system. 
The cucumbers were my best producers as soon as I determined the correct ratio of the nutrient mix to water and the frequency of dosing. Initially, I was not adding enough and the cuke flowers would fall off without creating vegetables. After I started adding nutrients every few days instead of once a week, my family and I started enjoying fresh cucumbers with our salads.  (Please be advised, I did not describe the garden pests - burrowing grubs or the Mexican beetles that I dealt with).
Using this growing method, I was extremely pleased with the results.

I also tried variations of growing plants in Zipgrow towers that year. For instance, I tried directly planting seeds in the towers.  Essentially, I sandwiched lettuce seeds between a paper towel and the absorbent cloth (see pic).  


A few of the lettuce seeds grew, but I only had one plant really become leafy and mature (not shown). I would say very limited success and not worth trying again. I had better growth by planting seeds in peet pods or seeding trays and then transplanting them into the towers.

In the fall and winter 2014, I tried growing brusselsprouts, but could not properly protect them from the cold. The water froze and the plants were scrapped. 

I determined that I needed a greenhouse to better protect from insects and weather. This was my goal for 2015 to be described in a later post.

Wednesday, December 23, 2015

2013: The Dream of Aquaponics

I had read about raising fish in my dad's copy of Reader's Digest "Back to Basics" while growing up and thought it was neat. In 2010, I later read about backyard pool farming and aquaponics (combining fish aquaculture with hydroponics). I thought it was cool and saved some of the links.

In 2013, my family moved into a house. Shortly after that time, I was faced with the possibility of a layoff because work slowed down. I knew that if I had to work at a part-time job; I would probably earn a Fed labor standard act job @ $7.25. The math would be 39 hours a week (because businesses are cheapskates) x $7.25 an hour x 4 weeks = $1131 per month. Exactly the amount for a house payment or rent. Gas bill not included, electricity not included, gasoline not included, water bill not included, insurance not included, food not included, phone not included. Essentially, NOONE CAN LIVE ON THAT. If this happened to my family in which I had to take a part time job or two part time jobs, I might not be paid enough to keep up with living expenses and forced into compromises in the form of credit or moving back in with relatives until I find a permanent job.

Luckily, work picked back up, but I was definitely worried. I thought aquaponics was a partial answer to all my fears (fish meat and fresh food all year long) which will save on my food bill. Plus, I was able to keep my son's goldfish alive for a whole year (a record for me). I was on a roll. So with a little funds, I tried setting up a barrelponics aquaponics system or at least a variation.

I purchased the following spending roughly $400-500 (mistakes included):
trash cans (for fish tanks)
cement mixing pans (for grow beds)
pipe fittings
washing machine hoses
PVC piping
five gallon buckets
several different buckets for a biofilter
rocks
water fountain pumps
garden hose and attachments

Again luckily, my wife convinced me not to buy any fish.


This design explained.
  1. The fish tank was going to be a 55 gallon trash can (http://www.homedepot.com/p/Rubbermaid-Commercial-Products-Brute-55-Gal-Grey-Round-Trash-Can-FG265500GRAY/100644100) with a hole drilled near the bottom. Two rosettes with nut (http://www.homedepot.com/p/DANCO-Faucet-Rosette-and-Nut-88652/203193994), a faucet extender (http://www.homedepot.com/p/DANCO-Faucet-Shank-Extender-89477/203194000), adapter (shown below that fits a water hose), and y-valve/splitter. (NOTE: Although not illustrated here, I used the Y-valve connected to an extra hose to siphon water and test waste capability of the swirl filter.) Water from the fish tank will drain into a closed swirl filter.
  2. Washing machine hose will drain water into a connected y-valve to brass adapter inserted into side of plastic lidded jar.  Plastic lidded jar will serve as swirl filter. As water passes into swirl filter, heavy solid debris was supposed to be separated out as the water is slowed down. Debris is supposed to remain in the swirl filter until cleaned.
  3. Output of separated water (without waste) was supposed to go to a garden hose connected to a second faucet shank extender inserted on the side of plastic lidded jar and output sent to the bio-filter.
  4. A 5 gallon bucket (Orange lines) served as the bio-filter. The bio-filter was supposed to perform the nitrification process of converting nitrites to nitrates. This requires lots of air, water, and surface area for microbes. This particular design was going to rely on the bell siphon to allow water to reach height and then drain. This cycle of flush and fill was supposed to allow the microbes the capability of performing their functions.  
  5. The bell siphon was also going to control the speed of the water by adjusting the drain tube to just below the average height of the water in the fish tank similar to draining one lock to another lock used in canals. The water output would then flush and flow into the grow bed.
  6. The grow bed would contain the plants in some sort of media like gravel. If output water from bio-filter is flushed frequently enough, then the plants get watered and can filter their nutrients out of the water. Since the water always drains out, the plants should never get water logged.
  7. A collection bucket for the water then takes it to a sump.
  8. The sump pump delivers the water back into the fish tank. Since using a fountain pump, pump shuts off when water has not reached level yet.
  9. Water returns to fish. The fish never run out of water because it will never drain past the water line or equilibrium as set by the height of the bell siphon drain in the bio-filter.


Problems encountered with this design.
  1. The swirl filter leaked. The first attempt was a 2 gallon bucket with a closed snap-on lid. This leaked at the seams even with caulking used as a seal. The second attempt was a 5 gallon bucket and its seal also leaked. The third attempt was a water jug with plastic screw lid (shown above). The water pressure caused the lid to bulge and leak.
  2. Even with the leak, the swirl filter was tested. As a test, I used 2 cups of rice dumped into the water and allowed the swirl filter to drain into the bio-filter. I used water supplied from the house through a garden hose to create a constant flow. As water drained, I reviewed how much rice was left in the trash can, the swirl filter, and bio-filter. The results were: roughly over 1 cup remained in tank; Less than 1/2 cup remained in swirl filter; With the leftover rice inside the bio-filter. Analysis: The placement of the drain collected less than 50% of the rice which means that the fish will drown in their own poo rather quickly; The swirl filter design separated debris less than 25% of the time due to the speed of the water did not slow down enough. If not slowed, debris will rush up into the bio-filter. The unwanted result is the bio-filter may get clogged rather quickly, stopping the nitrification cycle, and the bio-filter would stop functioning as a drain.
  3. To further test the capability of the swirl filter, I connected a hose to the y-valve and used the hose as a solid-lifting siphon to vacuum up the remaining rice (like devices used to clean fish tanks). Result: The rice collected in both the swirl filter and the bio-filter. Analysis: Water pressure and speed was greater than expected and unwanted debris was deposited in the bio- filter. Conclusion: The swirl filter needed a redesign and a real filter with media should be used, but I did not want to invest the funds since it was leaking.
  4. Next was trying to get the bell siphon to work. The test that I did was based on a normal draining cycle as it was planned. I will vary the height of the bio-filter to below equilibrium but never below half the height of the trash can/ fish tank and let the water drain through the swirl filter to the bio-filter and adjust the bio-filter height or the bell siphon as needed until the bell siphon works. The result was I could not tune the bell siphon to work without interference. Analysis: As water nears equilibrium, it slows. If the water slows too much, it will never exceed the draining speed of the stand pipe in the bell siphon meaning water doesn't fill the pipe to create a temporary vacuum that sucks air to create a water bell. Also, the bell siphon was made out of PVC which allowed the bell to float which again meant that the bell siphon never forces air to seal in the drain. The result was the water kept draining until the water level equaled the height of the drain tube. Variations in tube diameter was used. Changing height. Placing a U-bend in the drain. Ultimately, the speed of the water was not enough to close the deal. (NOTE: Maybe a float drain would work better which is popular now, but it was not available then and I had already lost a month and alot of patience at this time.) Conclusion: A redesign is needed preferably without a bell siphon. 
  5. Unable to test the rate of flow needed for the grow beds. I could not determine the frequency of flush needed for growing plants. 
Dissatisfied and frustrated, this project was abandoned.
Eventually, I recycled the trash cans as part of my rain barrels.

I would like to revisit aquaponics but only after I ensure that I can grow hydroponics first which is why I determined that Zipgrow towers would get me there faster and easier which I will elaborate on in a later post.

Wednesday, December 16, 2015

Backyard Layout and History

The Layout
The house is at the center of the plot. The garden is
on the southwestern side of the house in the backyard. This area has the most sun except for the northeast part of the front yard where the trees do not provide cover. At the backyard, the land has a 3-5 degrees incline away from the house. Water from the roof drains into garden area and can stay waterlogged for a week. The garden is circled in pink in the picture.


As stated before in a previous post, trees are growing all around the plot. These trees are nearly 100 ft and block the sunlight. Total time of sunlight is roughly 5 hrs per day. Reduced sunlight means reduced plant growth. Reduced sunlight means reduced evaporation increasing mold, root rot, and lanky plant growth. In addition, trees block wind so again reducing evaporation increasing mold and increasing moisture buildup on leaves which reduces photosynthesis.

Soil has 6-8 inches topsoil and the rest is orange dirtfill with clay and rock (my definition of dirtfill is dirt used to even out a landscape for placing a house). Other areas have deeper topsoil that support the trees.

We have witnessed the following wildlife in the area:

  1. deer
  2. chipmunks
  3. squirrels
  4. rabbits
  5. fox
  6. raccoon
  7. possum
  8. hawks
  9. owls
  10. birds
  11. snakes
  12. bats
  13. turtles
  14. salamanders
  15. frogs

Using this information, we decided the following:

  1. With the topsoil depth and water logging, tilling the soil is not an option.
  2. With rabbits, squirrels, and chipmunks in the area, raised beds are not a good option. Chipmunks and rabbits will burrow into the raised beds. Planters are a better choice, but I still saw a chipmunk hop into the planters.
  3. Whatever grow methods we use, we must pick a way that reduces the chance of water saturation or provide instant drainage. Regular planters are not a good choice because they still retain water in certain conditions or become saturated with water when it rains. This is why we chose Earthbox planters. Earthbox planters are a good choice because they have a water reservoir that has a set level and drains out excess when the limit is reached. Also Earthbox containers have a plastic cover that prevents rain from saturating the soil which also has the added benefit of not needing weeding.
  4. Limited growing area means being inventive and have good planning to take advantage of the limited resource area. 
That means using vertical growing methods whenever possible.
  1. Stagger plants by height to fully utilize growing area.
  2. The stackable tires are my daughter's decision and are a good idea so they stay. In theory, if growing a tubor root crop like sweet potatoes, when the plant roots start spreading, keep stacking more tires on top and cover with soil to create a mound. As the tubor grows vertically from the stacked tires, more tubor roots will grow creating a large harvest in a small area. The leaves also provide large ground cover blocking rain from over saturating the tire planters. Plus, the planters have a large hole in the bottom which has excellent drainage.
  3. Vines using trellises or vertical string to grow beans, tomatoes, cucumbers, etc.
  4. Vertical hydroponic methods to grow leafy greens like lettuce, collards, kale, etc.

Diversity will be the key in growing in the garden, the below image is the plan with the available area and the resources we have on-hand. Empty boxes are future resources that we plan on purchasing.


History
The first year, the family ran the garden while I was busy trying aquaponics (to be described in a later post). Sorry, no pics for either. They were using the Earthboxes, tires, basket, and planters. Unfortunately, we did not realize we were making a buffet for the deer. Much of the crop was raided. Also, the area remained moist for the remainder of the spring and summer from the previously mentioned reasons. They elevated the planters on discarded wood and plastic pallets to ventilate the moisture away. It reduced downy mildew and mold, but did not stop pests like slugs and snails. Insects like cabbage whites made mincemeat out of our greens.

The second year (2014), I fenced the area with 5 ft stakes and wire fence. No more deer here. this can be seen in the photo from my first post. I also started experimenting with using Zipgrow towers. The towers are located uphill near the power outlet. We still experienced mold and downy mildew. I also was regularly picking Mexican beetles (look like orange lady bugs or brown caterpillars) and stem boring worms from the cucumbers. Slugs, snails, and ants were a problem.


At the end of the year 2014, I laid plastic down on top of the ground as cover. I could not afford to put gravel or crushed shale so went with plastic and it has really worked well for 2015. The plastic killed many of the plants that was retaining moisture in the ground. It allowed water to drain away quickly. It reduced insects because they do not have a place to hide. It also reduced mud.

In 2015, the deer attacked the little grow house to get wild strawberries that were growing inside. I repaired it and decided to use the grow house for my hydroponics and start growing in the winter. I added aquarium lights and am in the process of growing collards, swiss chard, and cauliflower. The greenhouse has reduced some pests, but I must go out and pic snails and slugs off on a regular basis. 


Sunday, December 13, 2015

Mission summary for this blog

Let me start by saying vegetable gardening is not a passion for me. I am more at home with discussing video games, programming, my work, or electronics. My overall goal with this gardening project is to reduce my family's overall food bill by growing a portion of our vegetables. I have to face the facts, food prices are increasing. Just like inflation, the price of food has increased in my life time. I remember going into the store and getting ears of corn for 20 for $1 in season. Now, corn costs 4 for a $1. If this is the example, eventually, fresh food will be available only to those that can afford to grow it or the extreme wealthy. As a result of all this, I am endeavoring to try new things and try to grow fresh food in my backyard.

This blog will cover our backyard vegetable garden production using the styles that work for our backyard. It will detail success, failure, and hopefully provide measurable production compared to final costs. Some of these costs will be infrastructure costs and production costs.

To understand the styles you will need to know the backyard and its conditions for plant growth.


The Site.
Our backyard is an area that is surrounded by trees. This means we only have 5 hours of measurable daylight. All other light is scattered or shaded. When we moved into the house, we immediately thought the trees were great! They sheltered the house from direct sunlight and shielded the noise from the busy streets, but they do have their downsides. Those downsides are a reduced growing area for vegetable plants, limited sunlight, and raking tree leaves.

Limited sunlight obviously means plants don't grow as much as could be possible. Also limited sunlight means limited evaporation. When heavy rains occur, the backyard can stay moist longer which encourages mold growth. Less evaporation means plants remain water logged longer causing root rot or lanky growth.

Leaf cover reduces opportunity for the plants to grow naturally which means constant removal. Seeds from trees drop often in the same area so weeding is again constant.

For backyard growing, I measured the available growing area with at least 5 hrs of light at roughly 20x30 ft. Its more than some people can get but it is definitely limited.

Overall, all of these factors affect plant production.

The Growing Methods
The growing methods used will be a combination of Earthbox planters, earth mounds using stack-able tires, and hydroponics using Zipgrow towers. Each of these methods have merits for growing that fit within our backyard and its design. These merits will be discussed in later posts as well as the decision process and evolution/history that warranted these decisions.

The Resources
Water from rain barrels and water hose/attachments and pump.
Electricity (for the hydroponics).
Plastic and small grow house.
5 ft fencing.
Old tires.
Leftover wood strips.
Earthbox planters and watering system.
Zipgrow towers, water reservoir, pump, and piping.